
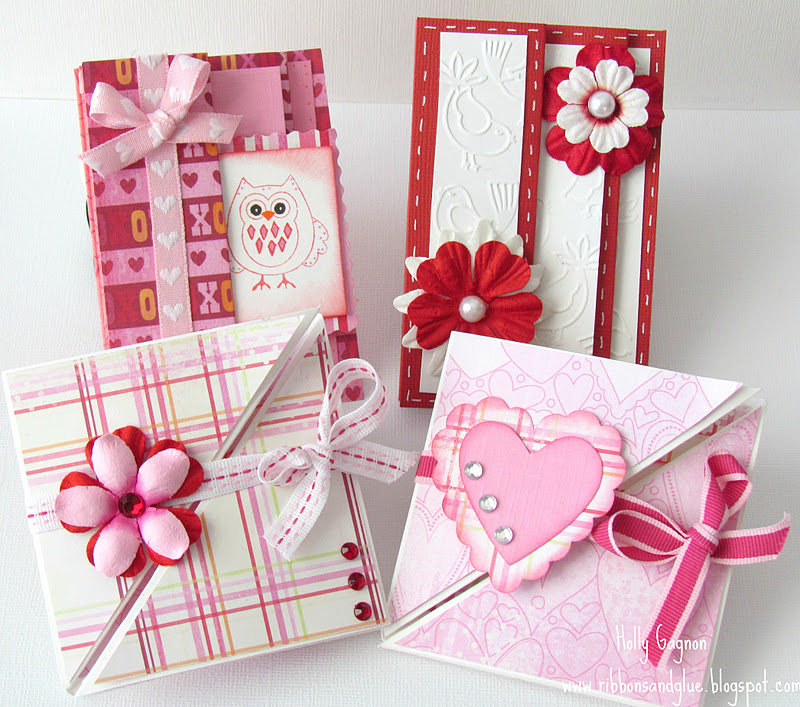
How to make a Triangular Tri-Fold Card
Supplies needed:Scoring Board
1 piece of 3 1/2" x 10 1/2" cardstock
Patterned paper
Ribbon
Image to fit on front of card, approx 3"-4"

Take your 3 1/2" x 10 1/2" strip of cardstock and score at 3 1/2" and 7".

Rotate paper and score diagonally on the end square corner to corner. Make sure both ends are going in the same diagonal.

Fold left side into the middle then fold triangle flap up. Do the same fold on the other side except fold the triangle down.

There you go, a simple little triangle tri-fold card that can be decorated in a million ways

Wrap a ribbon around your card and tie it with a bow to keep it closed. When adding your image to the front of the card remember to only adhere it to one side of the triangle flap. Otherwise, you won't be able to open the card.

How to make Accordion Fold Card
Supplies needed:Scoring Board
1 piece of 4 1/2 " x 11" cardstock
Patterned paper
Various embellishments

Score your 4 1/2" x 11" inch paper at 1 1/2", 3", 5 1/2" and 8".

Starting on left side, mountain and valley fold on the score lines

How cute are these Valentines stamps? They're from the new "It's Valentines" sentiments at K. Andrew Designs. Check out all of Kristal's stamps including her new Valentines sets- HERE
Happy Card Making!


I'm bookmarking this post! Very very helpful and great pictures showing how the folds should go.
ReplyDeletevery true
DeleteFabulous tutorial. I am definitely making some of these! The photos were so clear, great instructions!
ReplyDeleteLove both cards, super cute!
ReplyDeleteI love the cards! I will definitely be trying these.
ReplyDeleteThanks for the tutorials! Definitely going to try these folds!!
ReplyDeleteThanks for the tutorial, the cards are so cute will have to try them.
ReplyDeleteThanks for the measurements. I can't wait to try these.
ReplyDeleteLike these wonderful fold cards. Thanks for sharing the great step by step instructions. Going to give them a try.
ReplyDeleteMelissa
"Sunshine HoneyBee"
http://CreatedbySunshineHoneyBee.blogspot.com
Hi fгiends, its еnormous article regarding tutoгingand
ReplyDeleteсompletely ԁefined, keep it up all the time.
Feel free to surf to my page :: HomeSite
Love your cards, do you have a newsletter please? Cheers and thankyou.
ReplyDeletehermes on sale
ReplyDeletebape outlet
a bathing ape
supreme clothing
golden goose outlet
kd 15
kyrie shoes
ghdww52c5
ReplyDeletegolden goose outlet
golden goose outlet
golden goose outlet
golden goose outlet
supreme outlet
golden goose outlet
golden goose outlet
golden goose outlet
golden goose outlet
golden goose outlet